🌾Pale Ale
American Pale Ale
Lighter and more sessionable than an IPA, with beautiful Cascade hop aroma. Perfect first brew.
Bold citrus aroma, assertive hop bitterness, and a clean, dry finish — this is the quintessential American IPA. Brewed with Centennial, Cascade, and Citra hops, it drinks like a craft brewery pint but costs under $40 to make. Our #1 recommended first brew.
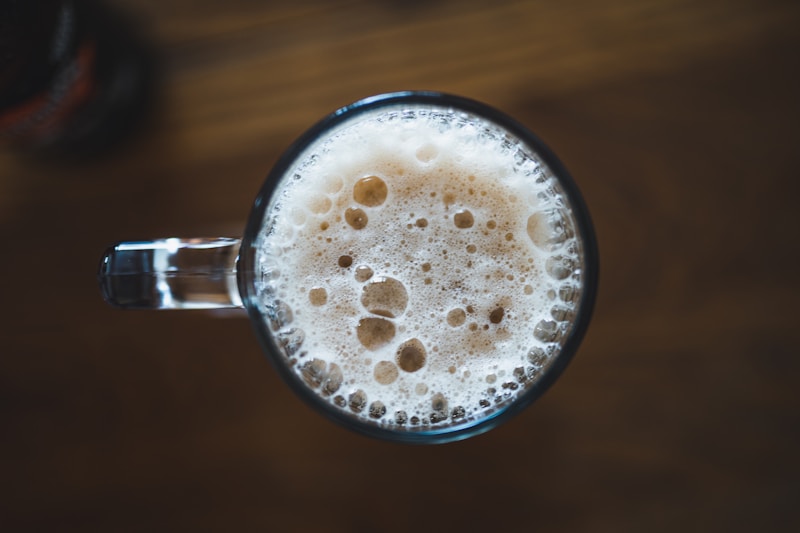
This IPA pours a clear golden amber with a white, creamy head. The aroma hits you first — fresh citrus (grapefruit, orange peel), tropical fruit from the Citra, and piney resin from the Centennial. On the palate, a clean malt backbone supports a firm but not harsh bitterness, finishing crisp and dry. This is the style that turned millions of people into craft beer fans.
Mix Star San per instructions (1 oz per 5 gallons of water) and sanitise your fermenter, lid, airlock, spoon, funnel, and hydrometer. No need to rinse — Star San is food safe at working concentration. Let equipment air-dry or use immediately.
Add 2.5 gallons of cold water to your kettle and heat to 155°F. Place the 0.5 lb of Crystal 40L grain in a muslin bag and submerge. Steep for 30 minutes, maintaining 150–158°F. The grain adds a touch of colour, light caramel sweetness, and body.
Lift the grain bag out of the kettle and let it drip naturally — do not squeeze it (squeezing can release tannins). Remove the kettle from heat. Add all 9 lbs of Light LME, stirring constantly and thoroughly to prevent it from scorching on the bottom.
Once you have a steady rolling boil, add 1.5 oz Centennial hops and start your 60-minute countdown timer. Watch the kettle carefully — the boil may foam up in the first 2 minutes (this is called "hot break"). Stir to prevent boil-over. Then relax, the boil runs itself.
With 15 minutes remaining, add 0.75 oz Cascade hops and 1 tsp Irish Moss. The Cascade hops add citrus and floral flavour. Irish Moss is a clarifying agent — it causes proteins to clump together and drop out of suspension, giving you a clearer finished beer.
With 5 minutes remaining, add 0.5 oz Simcoe hops. Late hop additions spend minimal time in the boil so their aromatic oils are not driven off by heat — this locks in tropical, piney, resinous aromas in your finished beer.
Turn off the heat. Add 0.5 oz Citra hops, stir gently, and let steep with a lid on for 10 minutes. The residual heat extracts intense tropical and citrus aroma without boiling off the delicate essential oils. Citra is the "secret weapon" of this recipe.
Fill your sink or a large tub with ice and cold water. Set the kettle in the ice bath and stir gently every few minutes. Cool to below 72°F — ideally 65–68°F. This should take 20–30 minutes. Rapid cooling prevents contamination (bacteria thrive between 80–120°F) and improves clarity.
Pour or siphon the cooled wort through a sanitised funnel/strainer into your fermenter. Top up with cold filtered water to reach 5 gallons total. Using your hydrometer, take an original gravity (OG) reading — target is 1.065. Record this number; you'll use it to calculate ABV later.
Sprinkle one packet of Safale US-05 directly onto the surface of the wort (no need to rehydrate dry yeast). Seal the fermenter, fill the airlock halfway with sanitiser solution, and insert it. Move the fermenter to a stable location at 65–68°F.
After 10 days, primary fermentation should be winding down (bubbling slows significantly). Carefully open the fermenter and add 1 oz Cascade hops directly in. Re-seal and leave for 5 more days. Dry hopping adds intense fresh hop aroma without any bitterness — this is what gives the beer that "just-brewed" smell in your glass.
On Day 15, take a hydrometer reading. Target final gravity (FG) is 1.012. If steady over 2 days, you're ready to bottle. Boil 5 oz corn sugar in 2 cups water, cool, gently stir into beer. Siphon into clean, sanitised bottles. Cap securely.
Store bottles at room temperature (65–72°F) for 2 weeks. The residual yeast consumes the priming sugar and creates natural CO₂ carbonation inside each bottle. After 2 weeks, chill one bottle for 24 hours, pop it open, pour into a clean glass, and enjoy the beer you made from scratch. 🍺
Something look or smell off? Here are the most common issues with this recipe and how to fix them next time:
All ingredients in this recipe are widely available from homebrew supply stores and online retailers. Below are our recommended sources — affiliate links help support this site at no extra cost to you.
The malt backbone of this recipe. Briess, Muntons, and MoreBeer house brands are all excellent.
Buy whole leaf or pellet hops. Pellet hops are easier to work with and store longer in the freezer.
The gold-standard dry ale yeast. Clean, reliable, and forgiving. Perfect for all American-style ales.
The industry standard for home brewing sanitation. One bottle lasts dozens of batches.
New to brewing? Don't have any equipment yet? Check our Starter Kit Buying Guide — we've reviewed the best beginner kits so you can get everything you need in one order.
Get our free beginner's guide — 30 tested recipes, equipment checklist, and brew day worksheet.
No spam, ever. Unsubscribe anytime.